Topic: DMD0500

Docking and Floating Views
Do-more Designer programming software uses multiple views that are constructed to perform dedicated tasks. The majority of these views are Dockable meaning the window can be connected to the sides, top, or bottom of another window, and Floatable meaning this window can "float" on the screen and remain functional while being unconnected to an edge of a containing window. Dockable / floatable views can be docked above, below, left, or right of each other, or even adjacent to each other regardless of whether the views are docked to the application or floating.
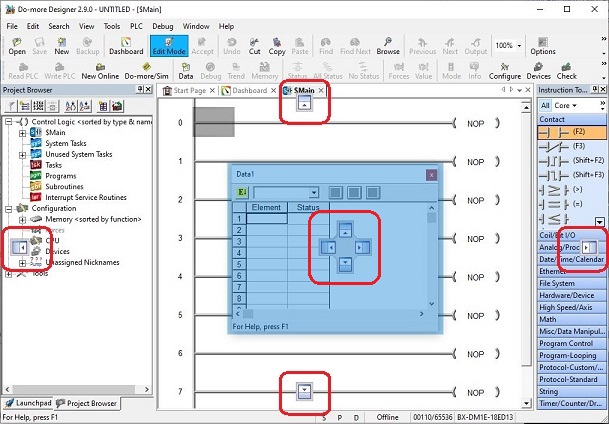
A view is moved by hovering the mouse over the title bar of a view and clicking and holding down the left mouse button, then dragging the view to the new location. When a view is selected for docking / floating, it's outline will be shown in reverse video, and anchor points - shown in the red outlines in the image below - will be displayed near the edges of the view where that view can be docked. Drag the mouse cursor over the anchor point and the outline will change to show the size and placement of the view once it's been docked at that edge. Release the mouse button to complete the docking move.
Docking and Floating
To dock a dockable / floatable view, grab its title bar by holding down the left mouse button, then move the mouse cursor to one of the anchor points that appear in the client area of Do-more Designer. You will see the reverse video block outline of the view while you are moving it around, and see it "snap" to the edge when your mouse cursor gets over the anchor point. Release the mouse button to drop the view there.
To float a dockable / floatable view, grab its title bar by holding down the left mouse button, then move the mouse cursor to any place on your screen, or even another screen if you have multi-monitor support. Release the mouse button to float the view there.
Stacking
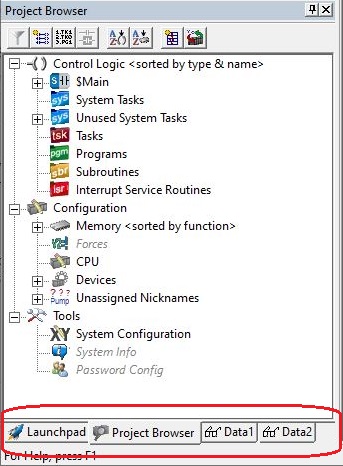
Views can be stacked on top of each other to create a tabbed group of views. When views are stacked on top of each other, a tab shows up on the bottom of the docked group for each view in the layered group. Refer to the image below where two Data Views have been stacked with the Launchpad and Project Browser.
To layer a dockable / floatable view with another dockable / floatable view, grab its title bar or its tab. You should see the reverse video block outline of the view while you move it around. Move the mouse cursor to the title bar or the tabs of the other view. The outline of the view you are dragging should "snap" to the other view's shape and reveal the outline of a tab at the bottom of the other view. Release the mouse button to stack the view on top of the other view.
To unstack a dockable / floatable view from another dockable / floatable view, grab its tab by holding down the left mouse button. You should see the reverse video block outline of the view while you move it around. Move the mouse cursor to anchor point to dock the view, or to a location on the scree that is not an anchor point to float the view.
Collapse / Hide / Pin / Auto-hide
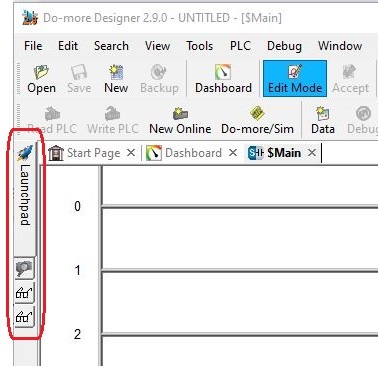
Docked views can be collapsed to the edge of the main window where they are docked, this is also know as 'hiding' or 'pinning' or using 'auto-hide' for views. When views are collapsed, small icon appears at the edge of the window where the view is collapsed. Refer to the image below where the group contain Launchpad, Project Browser, and two Data Views has been collapsed to the left edge.
To collapse a view, click on the Push-Pin button next to the Close button in the title bar. This will collapse the view to the edge where it is docked.
To momentarily open a collapsed view, float your cursor over its tab on the edge; move it away from the tab when done and the view will collapse again.
To temporarily open a collapsed view, click on its tab; click anywhere on the screen when done and the view will collapse again.
To permanently open (disable auto-hide) a collapsed view, reveal the view and click on the Push-Pin next to the Close button in the title bar to toggle it back to normal docked display mode.
See Also:
Do-more Designer Programming Windows